SZZS specific CEF50-main thread (initial builds and troubleshooting related only)

TCFlowClyde

Active member
Feb 26, 2022
1,227
789
Mesa, AZ
It is inside so not a big help if it is bad.
Like this?👇
Screenshot_20240305-223118.png

Basically the M820 torque sensor would look like these spindle versions?👇
Screenshot_20240305-224222.png

If so, looks like a warranty repair.😑
 
Last edited:

ficorama

Active member
Oct 9, 2021
300
285
Croatia
I had similar problems on 2 bikes. one was the speed sensor pinched cable, turbo levo. and the second one on the m510, the problem was that the magnet was too close to the speed sensor, so it had a cut off at lower speeds. I didn't even know what it was until I accidentally saw a speed of 58 km/h on the speedometer and I was driving around 4,5,6 km/h. I installed a disk with a magnet, and after that no problems. maybe it's the same problem with the magnet. @KaroKönig had described the same problem in one post, I think on the m510.
 

TCFlowClyde

Active member
Feb 26, 2022
1,227
789
Mesa, AZ
I had similar problems on 2 bikes. one was the speed sensor pinched cable, turbo levo. and the second one on the m510, the problem was that the magnet was too close to the speed sensor, so it had a cut off at lower speeds. I didn't even know what it was until I accidentally saw a speed of 58 km/h on the speedometer and I was driving around 4,5,6 km/h. I installed a disk with a magnet, and after that no problems. maybe it's the same problem with the magnet. @KaroKönig had described the same problem in one post, I think on the m510.
Hmmm. Symptoms seem more proper cadence/torque related on pedal input. Plus, no problems in the past using same disc rotor magnet. But I'll try to move the speed sensor around on the frame mounts in a different orientation to see if that works. 👍

The M820 is inherently a little finicky in boost on steep climbs. I wonder if the BESST tool can diagnose, but there is no error code appearing....yet. 😝
 

ficorama

Active member
Oct 9, 2021
300
285
Croatia
Hmmm. Symptoms seem more proper cadence/torque related on pedal input. Plus, no problems in the past using same disc rotor magnet. But I'll try to move the speed sensor around on the frame mounts in a different orientation to see if that works. 👍

The M820 is inherently a little finicky in boost on steep climbs. I wonder if the BESST tool can diagnose, but there is no error code appearing....yet.
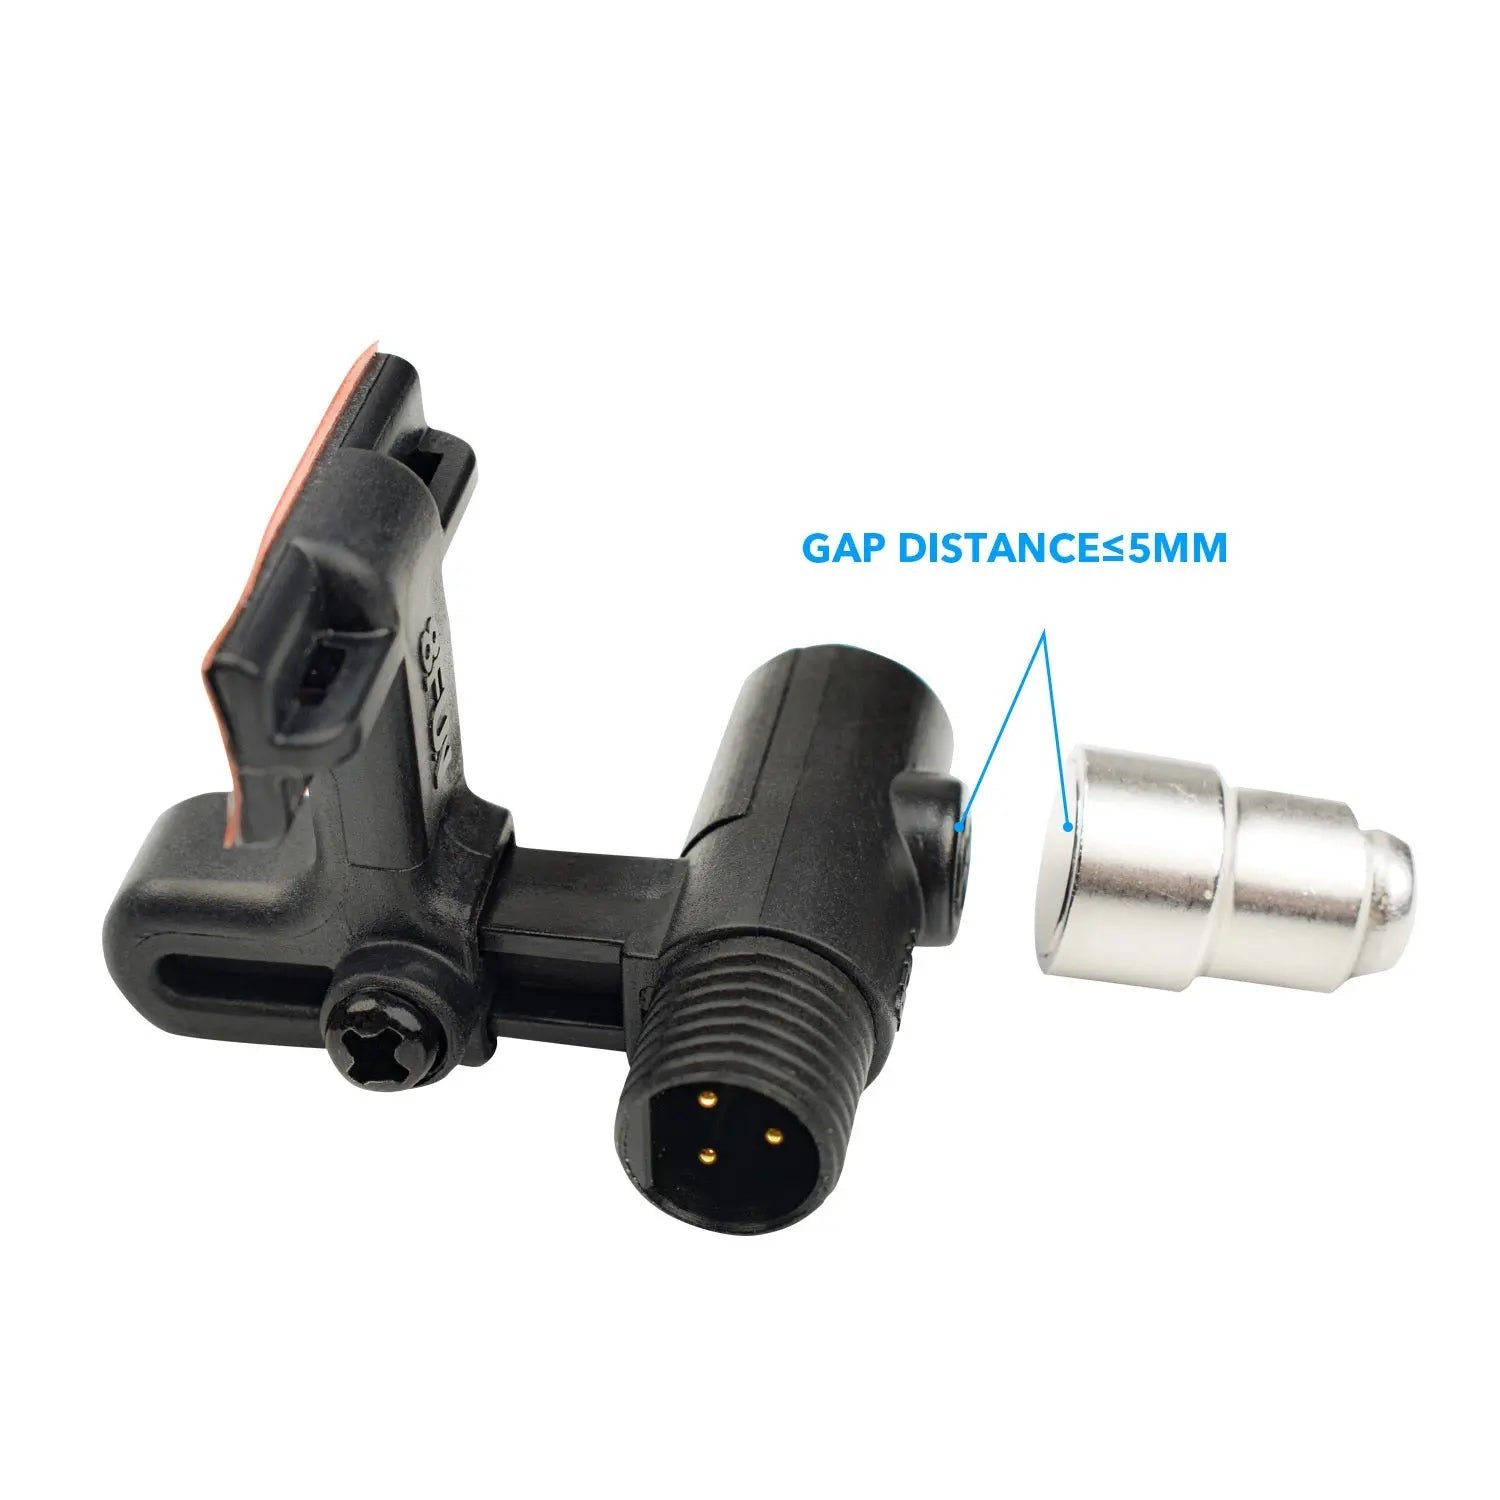
try a magnet, it's the easiest. I also thought it was the engine. tourqe sensor. I hope it will help. mainly, the gap between the magnet and the sensor should be increased. here are pictures of examples so you don't get me wrong, because I'm writing via google translate.

Bafang-Speed-Sensor-for-Bafang-BBS01-BBS02-BBSHD-Mid-Drive-Motor-Kit-ebikesolution-1676723112.jpg
 

TCFlowClyde

Active member
Feb 26, 2022
1,227
789
Mesa, AZ
try a magnet, it's the easiest. I also thought it was the engine. tourqe sensor. I hope it will help. mainly, the gap between the magnet and the sensor should be increased. here are pictures of examples so you don't get me wrong, because I'm writing via google translate.

View attachment 135794

try a magnet, it's the easiest. I also thought it was the engine. tourqe sensor. I hope it will help. mainly, the gap between the magnet and the sensor should be increased. here are pictures of examples so you don't get me wrong, because I'm writing via google translate.

View attachment 135794
It's disc rotor magnet, so distance is fixed. But here are two mounting tabs on the stay for the speed sensor so, I might try the other one just to rule it out.😇
 

ficorama

Active member
Oct 9, 2021
300
285
Croatia
It's disc rotor magnet, so distance is fixed. But here are two mounting tabs on the stay for the speed sensor so, I might try the other one just to rule it out.😇
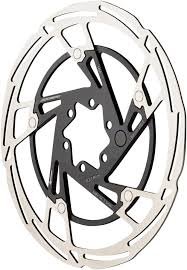
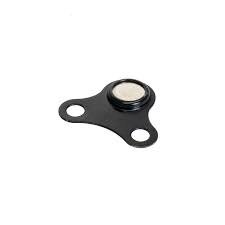
that's why I put a disc with a magnet to increase the gap. an ordinary magnet that is placed on the disk is 2-3 mm thicker, and with a magnet built into the disk, you increase the distance.

preuzmi.jpeg images.jpeg
 

TCFlowClyde

Active member
Feb 26, 2022
1,227
789
Mesa, AZ
Seems unlikely. Based on the recent symptoms, I've had no problems in the past 850 miles. But glad you figured it out for your situation.
 

Myalteregohamish

Active member
Jan 4, 2023
294
228
Vancouver, WA
Could be. 🤔
Was thinking @Myalteregohamish.
I had a short in mine from the water ingress in the yellow connector. Mine was specific to extender setup. But I could see it with any of the connectors. Have you been riding in the rain? Or getting the system wet? It can feel like fading even though it’s a short and it’s on off. But when it’s momentary it can feel as though it’s tapering off.
 

mike_kelly

Well-known member
Subscriber
Aug 11, 2022
898
724
US
The magnet is the speed sensor not the torque sensor. Yes the torque sensor is on the spindle and measures the rotation force you put on the pedals just like a power meter.
 

TCFlowClyde

Active member
Feb 26, 2022
1,227
789
Mesa, AZ
I had a short in mine from the water ingress in the yellow connector. Mine was specific to extender setup. But I could see it with any of the connectors. Have you been riding in the rain? Or getting the system wet? It can feel like fading even though it’s a short and it’s on off. But when it’s momentary it can feel as though it’s tapering off.
Ahh....no rain riding. Shoot, I may have over torqued my little M820...heavy rider pedal input and all! I'll go will a motor re-greasing first and take it from there.

Glad u got your's going again! Thanks for the feedback. 👊
 

TCFlowClyde

Active member
Feb 26, 2022
1,227
789
Mesa, AZ
Bafand motor has 3 years warranty why need to repair ourself?
Money and time. Cheaper to DIY and likely faster.

Plus, not many Bafang dealers nearby.

As soon it's properly diagnosed 1-2 weeks by dealer once found = $150, make the claim with SZZS 3-4 weeks, and Bafang replaces , 6-8 weeks. Shipping $60.

Total $210 for 10-14 weeks without a motor.

vs.

✅Buy new spare motor for $300 + shipping from SZZS if in stock = 3-4 weeks?

Warranty is effectively 24 months +.👇
Screenshot_20240307-064238.png
 

mike_kelly

Well-known member
Subscriber
Aug 11, 2022
898
724
US
Money and time. Cheaper to DIY and likely faster.

Plus, not many Bafang dealers nearby.

As soon it's properly diagnosed 1-2 weeks by dealer once found = $150, make the claim with SZZS 3-4 weeks, and Bafang replaces , 6-8 weeks. Shipping $60.

Total $210 for 10-14 weeks without a motor.

vs.

✅Buy new spare motor for $300 + shipping from SZZS if in stock = 3-4 weeks?

Warranty is effectively 24 months +.👇
View attachment 135857
I am afraid the price of the motor is going to be closer to $800 for a spare?
 

temon10

Well-known member
Feb 8, 2022
644
504
Malang, Indonesia
Money and time. Cheaper to DIY and likely faster.

Plus, not many Bafang dealers nearby.

As soon it's properly diagnosed 1-2 weeks by dealer once found = $150, make the claim with SZZS 3-4 weeks, and Bafang replaces , 6-8 weeks. Shipping $60.

Total $210 for 10-14 weeks without a motor.

vs.

✅Buy new spare motor for $300 + shipping from SZZS if in stock = 3-4 weeks?

Warranty is effectively 24 months +.👇
View attachment 135857
from Indonesia to send back motor to China for warranty will cost about $200, not yet the shipping cost from China to Indonesia. The risk of DIY thing :ROFLMAO: :ROFLMAO: :ROFLMAO:
 

voigtkampff

New Member
Oct 18, 2023
60
59
Poland
The big wait is over. This is "Modliszka" (Polish for Praying Mantis, well because it looks like one).

The frame arrived on Wed 6.03, I started the build around 15:00 and it was ridable at 2:00 in the night. Tuning and adjustments took the next 2 days. There are still some things to be done, but I will have to wait for the parts. The whole idea was to have an ebike that I could return home after battery runs out, hence I chose the lighter battery option (480Wh, carbon case) and used lots of other carbon parts. I prepared two wheelsets for this bike, one the lighter, "general-purpose", 29 inch trail wheels on carbon rims and the second one enduro/bikepark mullet setup on alloy rims and heavier tires. This way, by switching the wheels I can move my range/durability slider and change the ride characteristics. The pictures below are made with the enduro mullet setup, as the trail wheels need replacing the rear hub (9-50t XD cassette on XDR drum is too far right and falls outside the range of the derailleur). After solving this issue I expect to use the 1kg lighter trail wheelset 90% of the time as my area is quite hilly but not rocky.

Now, time for some eye candy.
IMG_1110.jpg

The paint is green-gold-blue chameleon.

IMG_1111.jpg

It is blue-ish when looking from the back at steeper angles.

IMG_1113.jpg

The anodized aluminium elements don't share this property so depending on the viewing angle they will look better or worse...

IMG_1114.jpg

Headset cable routing makes for a very clean, uncluttered cockpit, but its very problematic and will degrade cables very quickly, so I'm very ambivalent about this. Probably I'll drill holes in the frame sides and route the cables the more traditional way as soon as the plastic preload element in the headset wears out.

IMG_1117.jpg

Paint granules shining in the sunlight like millions of stars. I had my doubts about mixing the chameleon paint with neon-like green anodized elements and the grips, but I'm starting to think this looks really good after all. Let me know how you feel about it...

IMG_1119.jpg

On the other hand, golden-green Crankbrothers Mallet pedals look like they were made right for this paint. But they add yet another shade of green to the picture, increasing the visual chaos a bit.

IMG_1122.jpg
Clearly, we've had some mud in the forest today... The bottle cage remains still to be installed, probably will have to be a fidlock or side-insert carbon cage due to limited space.

IMG_1123.jpg

I put some frame protector sheets to protect the frame from rocks and zipties holding the mud guard. Both mudguard and frame protector of the world-renown Enlee brand from aliexpress ;) Beware, the frame protectors stink and need to be seasoned outdoors before use. But they create a "snake-skin" appearance that I kind of like.

IMG_1124.jpg

Yet another look at the cockpit (and the frame protectors on the toptube, probably useless).

IMG_1126.jpg

The Mantis-like appearance, you get the idea. The front light is temporary, just in case. I'll be looking for some solution powered from the central battery, I find Toptrek light from aliexpress (TM) interesting in this regard.

Some remarks regarding the build process.
  • the cable routing through rear triangle is a pain. Neodymium magnet with piece of steel wire makes this much easier (the tool can be bought at aliexpress from Toopre brand, looks and works just like Park Tools but is just a few bucks).
  • I used shock mounting hardware of length 22.2mm, the fit is tight but with a bit of grease it's perfectly doable.
  • I checked all the suspension screws, they were factory covered with threadlocker (good) but used way too little torque, tightening with a torque wrench is advised.
  • The battery comes inserted in the frame tight. So far I was unable to remove it, but eventually I will have to do it in order to install foam tubes protecting the cables from rattling,
  • Cable rattling is loud in both front and read triangle. Use foam tubes. I ride with headphones, otherwise this would get me very ignited.
  • Routing the cables through the headset right is an art. The looks are not worth it. The cables rub against the inner surface of the frame and will wear out very fast. I hate this headset
  • The headset squeaks, is either loose or noticeably hard to turn the handlebar. I already ordered 0.25mm gaskets to solve this, but still I believe the plastic preload element will wear out quickly. I hate this headset. This is the weakest point in this build.
  • The seattube features a carbon bulge well above the charging port preventing the insertion of seatpost. It makes the usable seatpost insertion length much shorter than it would look from the technical drawing. According to Jean, they made it on purpose to protect the charging port and her advice was "why don't you cut the seatpost?". Apparently it is possible to remove this bulge, I'm awaiting the movie which shows how.
  • The centerlock-mounted speed sensor magnet I got from SZZT (which is a Shimano lockring), is too close to the axle and misses the speed sensor no matter how you install it. I chose to glue a small neodymium magnet to brake rotor spider with epoxy instead and it works perfectly.
    IMG_1120.jpg

    Probably it would be better to bolt it with a rivet though.
  • Rear caliper mount seems to be faced nicely and there's not much pain planing the calipers.
  • High-end gearing of 34:10 seems like too low, I will change the front chainring to 36 or 38 (that's the reason why I'm testing 9-50t casette on the other wheelset).
  • The 48V engine is in fact 36V with a hacked firmware. This poses a problem, because Bafang Go+ app will offer to upgrade the firmware, replacing it with a stock 36V variant, causing mismatch with the battery. This is potentially dangerous. In other words, with this choice of engine voltage we are cut off from the easy firmware upgrades in case Bafang fixes some bugs. This is bad news. I wish I knew all the implications of having 48V engine before ordering, I would probably choose 43V version.
When going uphill, it feels like riding a tank, but with assistance level T or S (depending on the slope) it is rougly the same effort as my 10kg XC hardtail. I find myself often in a dilemma, should I drop to a lower gear or increase the assistance level. When going downhill I feel great safety margin. I could just let the brakes loose and let it flow, it feels like it will handle just about anything. I ride my tires 1.2 bar front/1.4 bar rear with flat-out inserts and this provides so much grip. I think I could make the pressure even lower, the inserts are suitable for emergency return home without air, so there's no real need to carry inner tube or pump.

The weight with my carbon wheelset is ~18kg, 19kg with the pictured DT Swiss M1900. There's a carbon handlebar, carbon dropper (KS Lev Ci) and carbon rails saddle. I was hoping it would feel a little bit more analog, but it's still perfectly ridable without power. Just not when you're dead tired.

The total cost of the parts for lighter carbon wheels variant is 4370$, additional 767$ for enduro wheels. I can share my bill of material with links to the parts offers, however I bought most of the parts during black week sales, so they will be much more expensive today. The RS Yari in the pictures is going to be upgraded to Lyrik Ultimate level (Charger 2.1 RC2, DebonAir C1), the cost of the upgrades is already included in the above and the parts are ready to assemble.

This build would not be possible without the help of members of this forum. The information I got from you was invaluable. Thank you all, you are awesome!
 
Last edited:

TCFlowClyde

Active member
Feb 26, 2022
1,227
789
Mesa, AZ
The big wait is over. This is "Modliszka" (Polish for Praying Mantis, well because it looks like one).

The frame arrived on Wed 6.03, I started the build around 15:00 and it was ridable at 2:00 in the night. Tuning and adjustments took the next 2 days. There are still some things to be done, but I will have to wait for the parts. The whole idea was to have an ebike that I could return home after battery runs out, hence I chose the lighter battery option (480Wh, carbon case) and used lots of other carbon parts. I prepared two wheelsets for this bike, one the lighter, "general-purpose", 29 inch trail wheels on carbon rims and the second one enduro/bikepark mullet setup on alloy rims and heavier tires. This way, by switching the wheels I can move my range/durability slider and change the ride characteristics. The pictures below are made with the enduro mullet setup, as the trail wheels need replacing the rear hub (9-50t XD cassette on XDR drum is too far right and falls outside the range of the derailleur). After solving this issue I expect to use the 1kg lighter trail wheelset 90% of the time as my area is quite hilly but not rocky.

Now, time for some eye candy.
View attachment 135999
The paint is green-gold-blue chameleon.

View attachment 136000
It is blue-ish when looking from the back at steeper angles.

View attachment 136001
The anodized aluminium elements don't share this property so depending on the viewing angle they will look better or worse...

View attachment 136002
Headset cable routing makes for a very clean, uncluttered cockpit, but its very problematic and will degrade cables very quickly, so I'm very ambivalent about this. Probably I'll drill holes in the frame sides and route the cables the more traditional way as soon as the plastic preload element in the headset wears out.

View attachment 136003
Paint granules shining in the sunlight like millions of stars. I had my doubts about mixing the chameleon paint with neon-like green anodized elements and the grips, but I'm starting to think this looks really good after all. Let me know how you feel about it...

View attachment 136004
On the other hand, golden-green Crankbrothers Mallet pedals look like they were made right for this paint. But they add yet another shade of green to the picture, increasing the visual chaos a bit.

View attachment 136005 Clearly, we've had some mud in the forest today... The bottle cage remains still to be installed, probably will have to be a fidlock or side-insert carbon cage due to limited space.

View attachment 136006
I put some frame protector sheets to protect the frame from rocks and zipties holding the mud guard. Both mudguard and frame protector of the world-renown Enlee brand from aliexpress ;) Beware, the frame protectors stink and need to be seasoned outdoors before use. But they create a "snake-skin" appearance that I kind of like.

View attachment 136007
Yet another look at the cockpit (and the frame protectors on the toptube, probably useless).

View attachment 136008
The Mantis-like appearance, you get the idea. The front light is temporary, just in case. I'll be looking for some solution powered from the central battery, I find Toptrek light from aliexpress (TM) interesting in this regard.

Some remarks regarding the build process.
  • the cable routing through rear triangle is a pain. Neodymium magnet with piece of steel wire makes this much easier (the tool can be bought at aliexpress from Toopre brand, looks and works just like Park Tools but is just a few bucks).
  • I used shock mounting hardware of length 22.2mm, the fit is tight but with a bit of grease it's perfectly doable.
  • I checked all the suspension screws, they were factory covered with threadlocker (good) but used way too little torque, tightening with a torque wrench is advised.
  • The battery comes inserted in the frame tight. So far I was unable to remove it, but eventually I will have to do it in order to install foam tubes protecting the cables from rattling,
  • Cable rattling is loud in both front and read triangle. Use foam tubes. I ride with headphones, otherwise this would get me very ignited.
  • Routing the cables through the headset right is an art. The looks are not worth it. The cables rub against the inner surface of the frame and will wear out very fast. I hate this headset
  • The headset squeaks, is either loose or noticeably hard to turn the handlebar. I already ordered 0.25mm gaskets to solve this, but still I believe the plastic preload element will wear out quickly. I hate this headset. This is the weakest point in this build.
  • The seattube features a carbon bulge well above the charging port preventing the insertion of seatpost. It makes the usable seatpost insertion much smaller than it would look from the technical drawing. According to Jean, they made it on purpose to protect the charging port and her advice was "why don't you cut the seatpost?". Apparently it is possible to remove this bulge, I'm awaiting the movie which shows how.
  • The centerlock-mounted speed sensor magnet I got from SZZT (which is a Shimano lockring), is too close to the axle and misses the speed sensor no matter how you install it. I chose to glue a small neodymium magnet to brake rotor spider with epoxy instead and it works perfectly.
    View attachment 136015
    Probably it would be better to bolt it with a rivet though.
  • Rear caliper mount seems to be faced nicely and there's not much pain planing the calipers.
  • High-end gearing of 34:10 seems like too low, I will change the front chainring to 36 or 38 (that's the reason why I'm testing 9-50t casette on the other wheelset).
When going uphill, it feels like riding a tank, but with assistance level T or S (depending on the slope) it is rougly the same effort as my 10kg XC hardtail. I find myself often in a dilemma, should I drop to a lower gear or increase the assistance level. When going downhill I feel great safety margin. I could just let the brakes loose and let it flow, it feels like it will handle just about anything. I ride my tires 1.2 bar front/1.4 bar rear with flat-out inserts and this provides so much grip. I think I could make the pressure even lower, the inserts are suitable for emergency return home without air, so there's no real need to carry inner tube or pump.

The weight with my carbon wheelset is ~18kg, 19kg with the pictured DT Swiss M1900. There's a carbon handlebar, carbon dropper (KS Lev Ci) and carbon rails saddle. I was hoping it would feel a little bit more analog, but it's still perfectly ridable without power. Just not when you're dead tired.

The total cost of the parts for lighter carbon wheels variant is 4370$, additional 767$ for enduro wheels. I can share my bill of material with links to the parts offers, however I bought most of the parts during black week sales, so they will be much more expensive today. The RS Yari in the pictures is going to be upgraded to Lyrik Ultimate level (Charger 2.1 RC2, DebonAir C1), the cost of the upgrades is already included in the above and the parts are ready to assemble.

This build would not be possible without the help of members of this forum. The information I got from you was invaluable. Thank you all, you are awesome!
Awesome sparkl'n green...luv'n it!🤟
 

calvintys

Member
Sep 12, 2023
189
186
Malaysia
The big wait is over. This is "Modliszka" (Polish for Praying Mantis, well because it looks like one).

The frame arrived on Wed 6.03, I started the build around 15:00 and it was ridable at 2:00 in the night. Tuning and adjustments took the next 2 days. There are still some things to be done, but I will have to wait for the parts. The whole idea was to have an ebike that I could return home after battery runs out, hence I chose the lighter battery option (480Wh, carbon case) and used lots of other carbon parts. I prepared two wheelsets for this bike, one the lighter, "general-purpose", 29 inch trail wheels on carbon rims and the second one enduro/bikepark mullet setup on alloy rims and heavier tires. This way, by switching the wheels I can move my range/durability slider and change the ride characteristics. The pictures below are made with the enduro mullet setup, as the trail wheels need replacing the rear hub (9-50t XD cassette on XDR drum is too far right and falls outside the range of the derailleur). After solving this issue I expect to use the 1kg lighter trail wheelset 90% of the time as my area is quite hilly but not rocky.

Now, time for some eye candy.
View attachment 135999
The paint is green-gold-blue chameleon.

View attachment 136000
It is blue-ish when looking from the back at steeper angles.

View attachment 136001
The anodized aluminium elements don't share this property so depending on the viewing angle they will look better or worse...

View attachment 136002
Headset cable routing makes for a very clean, uncluttered cockpit, but its very problematic and will degrade cables very quickly, so I'm very ambivalent about this. Probably I'll drill holes in the frame sides and route the cables the more traditional way as soon as the plastic preload element in the headset wears out.

View attachment 136003
Paint granules shining in the sunlight like millions of stars. I had my doubts about mixing the chameleon paint with neon-like green anodized elements and the grips, but I'm starting to think this looks really good after all. Let me know how you feel about it...

View attachment 136004
On the other hand, golden-green Crankbrothers Mallet pedals look like they were made right for this paint. But they add yet another shade of green to the picture, increasing the visual chaos a bit.

View attachment 136005 Clearly, we've had some mud in the forest today... The bottle cage remains still to be installed, probably will have to be a fidlock or side-insert carbon cage due to limited space.

View attachment 136006
I put some frame protector sheets to protect the frame from rocks and zipties holding the mud guard. Both mudguard and frame protector of the world-renown Enlee brand from aliexpress ;) Beware, the frame protectors stink and need to be seasoned outdoors before use. But they create a "snake-skin" appearance that I kind of like.

View attachment 136007
Yet another look at the cockpit (and the frame protectors on the toptube, probably useless).

View attachment 136008
The Mantis-like appearance, you get the idea. The front light is temporary, just in case. I'll be looking for some solution powered from the central battery, I find Toptrek light from aliexpress (TM) interesting in this regard.

Some remarks regarding the build process.
  • the cable routing through rear triangle is a pain. Neodymium magnet with piece of steel wire makes this much easier (the tool can be bought at aliexpress from Toopre brand, looks and works just like Park Tools but is just a few bucks).
  • I used shock mounting hardware of length 22.2mm, the fit is tight but with a bit of grease it's perfectly doable.
  • I checked all the suspension screws, they were factory covered with threadlocker (good) but used way too little torque, tightening with a torque wrench is advised.
  • The battery comes inserted in the frame tight. So far I was unable to remove it, but eventually I will have to do it in order to install foam tubes protecting the cables from rattling,
  • Cable rattling is loud in both front and read triangle. Use foam tubes. I ride with headphones, otherwise this would get me very ignited.
  • Routing the cables through the headset right is an art. The looks are not worth it. The cables rub against the inner surface of the frame and will wear out very fast. I hate this headset
  • The headset squeaks, is either loose or noticeably hard to turn the handlebar. I already ordered 0.25mm gaskets to solve this, but still I believe the plastic preload element will wear out quickly. I hate this headset. This is the weakest point in this build.
  • The seattube features a carbon bulge well above the charging port preventing the insertion of seatpost. It makes the usable seatpost insertion length much shorter than it would look from the technical drawing. According to Jean, they made it on purpose to protect the charging port and her advice was "why don't you cut the seatpost?". Apparently it is possible to remove this bulge, I'm awaiting the movie which shows how.
  • The centerlock-mounted speed sensor magnet I got from SZZT (which is a Shimano lockring), is too close to the axle and misses the speed sensor no matter how you install it. I chose to glue a small neodymium magnet to brake rotor spider with epoxy instead and it works perfectly.
    View attachment 136015
    Probably it would be better to bolt it with a rivet though.
  • Rear caliper mount seems to be faced nicely and there's not much pain planing the calipers.
  • High-end gearing of 34:10 seems like too low, I will change the front chainring to 36 or 38 (that's the reason why I'm testing 9-50t casette on the other wheelset).
  • The 48V engine is in fact 36V with a hacked firmware. This poses a problem, because Bafang Go+ app will offer to upgrade the firmware, replacing it with a stock 36V variant, causing mismatch with the battery. This is potentially dangerous. In other words, with this choice of engine voltage we are cut off from the easy firmware upgrades in case Bafang fixes some bugs. This is bad news. I wish I knew all the implications of having 48V engine before ordering, I would probably choose 43V version.
When going uphill, it feels like riding a tank, but with assistance level T or S (depending on the slope) it is rougly the same effort as my 10kg XC hardtail. I find myself often in a dilemma, should I drop to a lower gear or increase the assistance level. When going downhill I feel great safety margin. I could just let the brakes loose and let it flow, it feels like it will handle just about anything. I ride my tires 1.2 bar front/1.4 bar rear with flat-out inserts and this provides so much grip. I think I could make the pressure even lower, the inserts are suitable for emergency return home without air, so there's no real need to carry inner tube or pump.

The weight with my carbon wheelset is ~18kg, 19kg with the pictured DT Swiss M1900. There's a carbon handlebar, carbon dropper (KS Lev Ci) and carbon rails saddle. I was hoping it would feel a little bit more analog, but it's still perfectly ridable without power. Just not when you're dead tired.

The total cost of the parts for lighter carbon wheels variant is 4370$, additional 767$ for enduro wheels. I can share my bill of material with links to the parts offers, however I bought most of the parts during black week sales, so they will be much more expensive today. The RS Yari in the pictures is going to be upgraded to Lyrik Ultimate level (Charger 2.1 RC2, DebonAir C1), the cost of the upgrades is already included in the above and the parts are ready to assemble.

This build would not be possible without the help of members of this forum. The information I got from you was invaluable. Thank you all, you are awesome!
Nice build bro, dont worry about the firmware update, my 48v motor accidentally upgrade to 36V firmware and my motor will shoot out over voltages error code so i have besst to update it back to 48v firmware n my bike back to normal.
 
Last edited:

voigtkampff

New Member
Oct 18, 2023
60
59
Poland
Folks, when you remove the front chainring spider lockring, how do you lock the spider in place to keep it from spinning? I feel bad having to tension the chain and wheel so much for this...
 
Last edited:

TCFlowClyde

Active member
Feb 26, 2022
1,227
789
Mesa, AZ
Folks, when you remove the front chainring spider lockring, how do you lock the spider in place to keep it from spinning? I feel bad having to tension the chain and wheel so much for this...
Pin down the rear brake lever.

If in the bike stand, a zip tie on the rear grip locking down the rear brake lever. Or out the stand upside down on the floor, I use my foot to press down on the rear brake lever (drive side) for a moment to simultaneously loosen the locking.

Either way, rear brake engagement locks the drivetrain in place..
 
Last edited:

EMTB Forums

Since 2018

The World's largest electric mountain bike community.

523K
Messages
25,839
Members
Join Our Community

Latest articles


Top