Lightcarbon LCE930 Custom Build - DV8

Sayonara

New Member
Jan 21, 2024
114
26
Finland
Found this listing for the same wheelset but little cheaper and cheaper postage but only few sells and new store. Shipped from same place apparently.

Never used aliexpress before so I think I will use the more popular one to be safe.

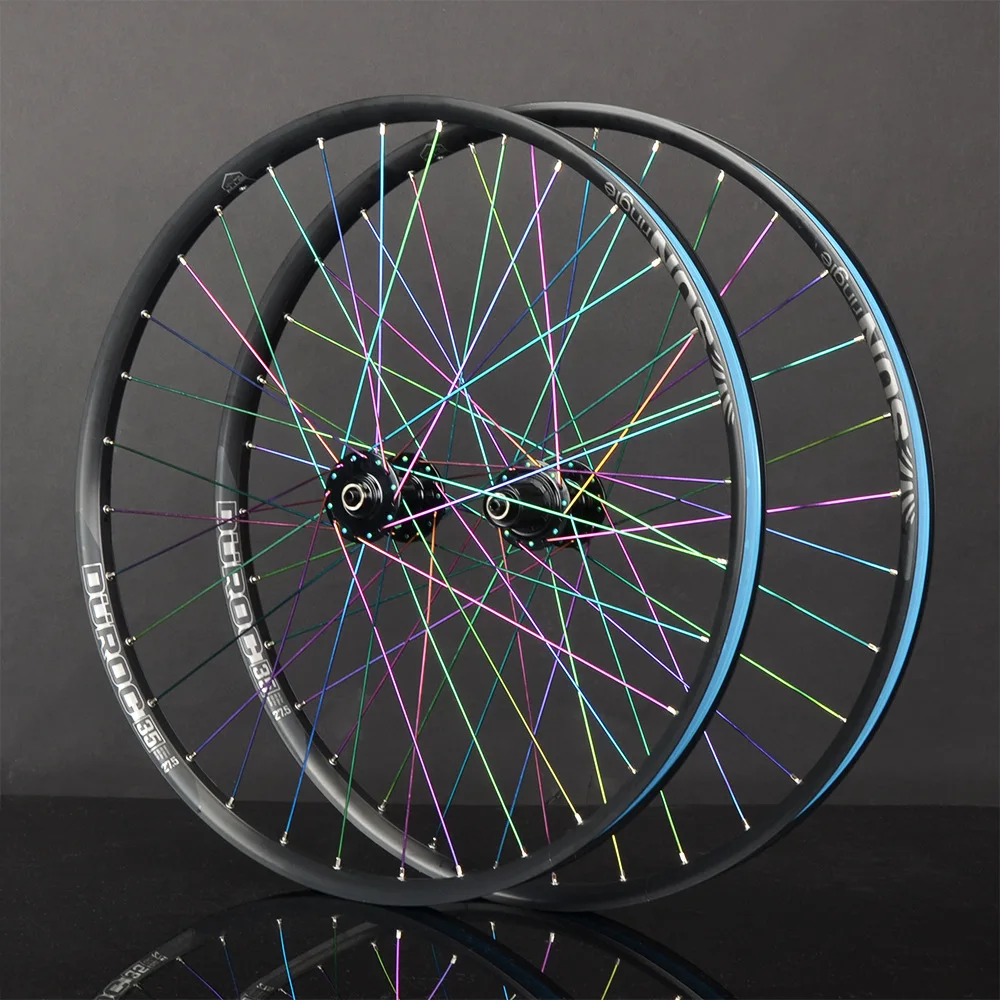
€77.99 8%OFF | Custom Built Mountain bike wheelset 27.5/29 inchs Duroc 30/35 Tubeless Ready rim XM490pro Hub 8-11S Microspline 12S MTB wheel
 

sandnap

New Member
Dec 23, 2023
75
80
Herriman, UT USA
Oh that's interesting quite a big difference to me. Seen in the photos. However if I go to the same shops listing about the same wheel but boosted option and there you can choose black hub with black spokes for the same price 😅
That is interesting. All hub color and spoke options are the same price in the US.

I just recently started buying from aliexpress too and so far I have had good luck. It is probably wise to do business with reputable shops. I have seen some pricing from new shops that is very hard to believe.
 

Sayonara

New Member
Jan 21, 2024
114
26
Finland
Watched all your vids regarding this build. I think I will paint my bike as well. 😁 thanks for showing the process.

Where did you get your brake rotors and dropper post lever with the bearing?
 

sandnap

New Member
Dec 23, 2023
75
80
Herriman, UT USA
Watched all your vids regarding this build. I think I will paint my bike as well. 😁 thanks for showing the process.

Where did you get your brake rotors and dropper post lever with the bearing?
(y) I bought the new lever from aliexpress, 4.9 star reviews and on sale for a great price:

ZTTO Bicycle Dropper Seatpost Remote Wire Control MTB Mountain Road Bike Seat Tube Switch Height Cable Adjustable Lever

I had one of the brake rotors on hand and I purchased the other rotor from Amazon. I believe they are both Bucklos brand. I have the same brand on my other ebike and I don't have any complaints.
 

Freda

Member
Feb 5, 2023
97
92
Vaasa
Build review video added to the original post and below.

I had same issue with installing the motor and holding the two spacers in place. I ended up filing down the non-drive side spacer flange. Makes it much easier to install since the drive side spacer stays relatively good in place and I can put the other spacer there when the bolt is half way through. When everything is in place the flange has no function anyways.
 
Last edited:

brbr

Active member
Dec 28, 2022
463
244
France
Build review video added to the original post and below.

These Fu$**$!? spacers :D I had to disassemble the motor several times and these spacers makes me crazy.

Regarding the dropper post line, you can route it under the motor and by the back! I had to change the cable and I did like that to avoid removing the motor, it's not great, but it works
 

crustafur

New Member
Nov 22, 2023
12
34
Orlando, FL
These Fu$**$!? spacers :D I had to disassemble the motor several times and these spacers makes me crazy.

Regarding the dropper post line, you can route it under the motor and by the back! I had to change the cable and I did like that to avoid removing the motor, it's not great, but it works
Probably the wrong space for this, but since its being talked about...I'll add what I did with the spacers to make the motor install MUCH easier. I used a sliver of painters tape, stuck it to the ID of the shouldered spacer with about an equal amount of tape hanging out of it. Then I mounted the spacer in the frame and stuck the section of tape I left hanging out to the frame and folded downward getting a nice tight hold. Hope that makes sense!
 

8Grunf

New Member
Jan 29, 2024
7
16
Italia
It's not safe to run the external brake hose through the fork slider, but the bike is nice anyway.
 
Last edited:

sandnap

New Member
Dec 23, 2023
75
80
Herriman, UT USA
It's not safe to run the external brake hose through the fork slider, but the bike is nice anyway.
Thanks! Yeah I am not fond of the internal head tube cable routing but I'll deal with it because so far I love everything else. I will be disassembling it and checking for wear more often that I might if it was traditional frame routing, at least until I am confident that it isn't wearing down the cables.
 
Last edited:

sandnap

New Member
Dec 23, 2023
75
80
Herriman, UT USA
Probably the wrong space for this, but since its being talked about...I'll add what I did with the spacers to make the motor install MUCH easier. I used a sliver of painters tape, stuck it to the ID of the shouldered spacer with about an equal amount of tape hanging out of it. Then I mounted the spacer in the frame and stuck the section of tape I left hanging out to the frame and folded downward getting a nice tight hold. Hope that makes sense!
Another great idea. You are right, these types of tips should probably be in the general LCE930 thread for maximum exposure.
 

8Grunf

New Member
Jan 29, 2024
7
16
Italia
Thanks! Yeah I am not fond of the internal head tube cable routing but I'll deal with it because so far I love everything else. I will be disassembling it and checking for wear more often that I might if it was traditional frame routing, at least until I am confident that it isn't wearing down the cables. Luckily if the rear brake fails there is always the front brake to make a terrifying situation slightly less terrifying.
I didn't explain myself, I apologize for my English but I meant the passage of the front brake hose to the caliper
 

TobyB

New Member
Aug 26, 2023
27
36
Seattle WA
Good to know about the run, I think I’ll insulate my cables that run inside. For the rear brake I’m going to try to run the rear brake on the outside, I bought some adhesive cable guides from Amazon. I’m not sure how it will perform but I’ll give them a try.

IMG_4985.jpeg IMG_4984.jpeg IMG_4983.jpeg
 

sandnap

New Member
Dec 23, 2023
75
80
Herriman, UT USA
I finally had an opportunity for a short trail ride. Unfortunately the ground was soft so I had to take it easy. The trail I took is a steady, rocky climb with switchbacks.

Powerwise it's about what I expected. It helped me out a lot but I was winded at the top of the climb. It likes a higher cadence than I am used to. My full power emtb has a lot more power overall but especially at a lower cadence.

It feels very very similar but noticeably slacker than my Specialized enduro carbon.

I am looking forward to drier trails so that I can wring it out a bit more.

1000003939.jpg


1000003941.jpg
 

Mannolo9

New Member
Feb 13, 2024
15
4
France
My LCE930 Build is underway!

Thanks to Lightcarbon for providing such a well built frame! It looked flawless on the inside and outside.

View attachment 133339

The Components:

View attachment 133340

The total build cost is 3117.89 USD including shipping, taxes, etc.. The anticipated weight is 19.47kg -> Actual weight is 19.77kg.

Part I, Paint is complete:

View attachment 133342

Watch me paint!


Part II, Assembly is complete:


Part III, Build review:

do you use specific tyres for emtb?
 

sandnap

New Member
Dec 23, 2023
75
80
Herriman, UT USA
do you use specific tyres for emtb?
Some tire brands offer emtb specific tires but I believe the majority of riders (including myself) use regular mtb tires with a thick downhill/enduro casing. I went with lighter casing and I hope I don't regret it. I will be installing Cushcore inserts which should help.
 

Mannolo9

New Member
Feb 13, 2024
15
4
France
Some tire brands offer emtb specific tires but I believe the majority of riders (including myself) use regular mtb tires with a thick downhill/enduro casing. I went with lighter casing and I hope I don't regret it. I will be installing Cushcore inserts which should help.
Thanks for your comment!!!
 

Mannolo9

New Member
Feb 13, 2024
15
4
France
My LCE930 Build is underway!

Thanks to Lightcarbon for providing such a well built frame! It looked flawless on the inside and outside.

View attachment 133339

The Components:

View attachment 133340

The total build cost is 3117.89 USD including shipping, taxes, etc.. The anticipated weight is 19.47kg -> Actual weight is 19.77kg.

Part I, Paint is complete:

View attachment 133342

Watch me paint!


Part II, Assembly is complete:


Part III, Build review:

Do you recommend some specific painting brand? And do you have to apply something before painting and after that?
 

sandnap

New Member
Dec 23, 2023
75
80
Herriman, UT USA
Do you recommend some specific painting brand? And do you have to apply something before painting and after that?
The frame came painted in matte black. I roughed up the paint with some 800 grit sandpaper and wiped it down with alcohol before applying the paint.

The paint and clearcoat I used:
1000003408.jpg
 

sandnap

New Member
Dec 23, 2023
75
80
Herriman, UT USA
It certainly looks good, i’ll give you that! 😄
I just hope it will last. In most cases, paint won’t adhere well without primer, so more likely to chip or peel off. Good thing you sanded for a smooth surface though.
Thanks! Yeah I have been painting vehicles for quite a while. I took my chances in order to avoid painting the black and gray areas. If it doesn't stick I'll be redoing it which won't be a big deal.
 

Mannolo9

New Member
Feb 13, 2024
15
4
France
As well as I could. It was not as bad as I thought it would be though, it went pretty fast.
sorry for making a lot of question, but it is my first time with DIY mtb project... so, last Question; did you take all the bearings out? or you just did cover them with the blue tape?
 

EMTB Forums

Since 2018

The World's largest electric mountain bike community.

523K
Messages
25,816
Members
Join Our Community

Latest articles


Top