replacing brakes

Cavi

Active member
Jun 15, 2020
374
123
California, usa
o my M20 came with 2 piston calipers and I want to go to 4 piston calipers. I want to run the XT but that means replacing the housing. Does anyone know if there are guide tubes in the frame or is the shop going to go crazy?
 

jbrown15

Well-known member
May 27, 2020
742
628
Chilliwack, Canada
I switched out the lower Shimao brakes that came with my Wild to some 4-piston XTR's that I have. Any shop should be able to swap them out without any issues. Just make sure you give them the key to your bike.
 

jbrown15

Well-known member
May 27, 2020
742
628
Chilliwack, Canada
Key? Am I missing something, I do not recall getting a key with my orbea rise???

sorry my bad, I was thinking you had a Wild. There’s a chance they might have to drop the motor and battery to swap out the rear brake. But that shouldn’t be that hard.
 

volts

Active member
May 15, 2018
334
258
DK
I just switched to a deore caliper on the back with xt handles. That way I kept the hose without having to drop the motor. full xt on front, and 203mm rotors. Works perfectly.
 

Cavi

Active member
Jun 15, 2020
374
123
California, usa
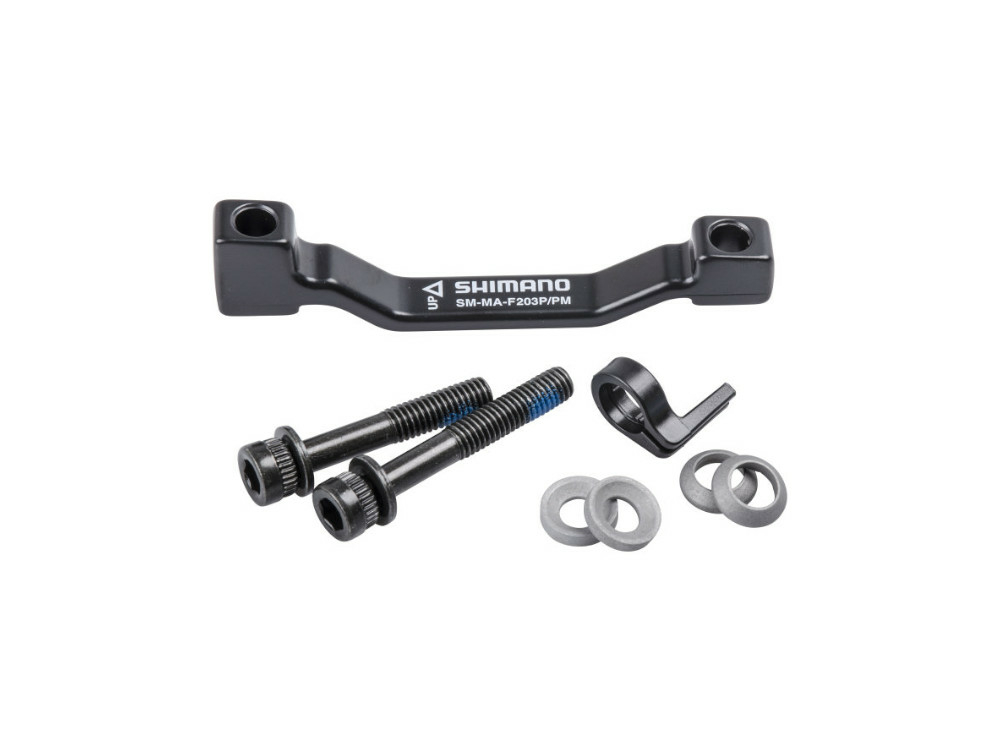
that is what I am doing, I am going deore 4 piston in the back and xt up front. Will probably do the 203 disc after, need to see what adaper I need and order it
 

crencos

Member
May 18, 2021
20
13
Portugal
Drop the motor and battery.
No need.
I´ve swapped the M20 brakes on 2 bikes for 4pot SLX and only needed the parktool guide. I only take out the motor and battery to fit the neoprene protection sleeve because the Rise didn´t come with one inside and the rattle is annoying.
 

Bencab

Well-known member
Feb 13, 2020
190
483
California
No need.
I´ve swapped the M20 brakes on 2 bikes for 4pot SLX and only needed the parktool guide. I only take out the motor and battery to fit the neoprene protection sleeve because the Rise didn´t come with one inside and the rattle is annoying.

i cannot move my rear brake hose without removing the battery. Hose was pushed hard against the frame by the battery.
 

Rod B.

Well-known member
Aug 18, 2021
493
838
USA, Orange County Ca.
Cavi,

If you decide to go with an XT caliper, instead of a Deore four piston on the rear and you do not want to replace the brake hose, there are several companies which make a banjo adapter for Shimano straight fitting brake hose. With an adapter, you can use the brake hose which comes on your Rise M20. If you do decide to use an adapter, you will also need to buy the bolt which secures the banjo fitting to the caliper.

Screenshot 2021-11-20 05.40.17.jpg


Screenshot 2021-11-20 05.42.28.jpg


I have never used a Banjo adapter. I suggest replacing the rear brake hose if you ever do decide to go with a XT caliper. I mention the banjo adapter because I do not know your mechanical ability with regards to replacing a brake hose on the Rise, or access to a bike shop to replace the brake hose. Sometimes you have to adapt and overcome....See what I did there...

I've replaced my M20's brake hoses multiple times when I experimented with SRAM and Shimano brake systems. I ended up using Shimano M8120 XT calipers front and rear. With a 203mm rotor on the front of my Fox 36 and a 180mm on the rear, I have plenty of brake power and I've never experienced any brake fade or rotor overheating.

As for me personally, I like to drop the motor when replacing brake house or cable housing. There are several benefits to dropping the motor. By doing so, you can insure your not going to damage, disconnect, or pinch a wire where pulling brake hose or cable housing through the downtube and over the top of the motor. There are a lot of small gauge wires in the area of the motor.

Pulling the brake hose through the frame using a cable routing tool is absolutely possible, I've done it, however it does not insure the cable or brake housing hasn't forced a wire hard up against a pinch point on the motor or frame. By dropping the motor, you can get your hands up in this area and feel around to make sure nothing is pinched. It also allows you to physically check your shift and dropper cables and replace them if necessary.

If you or any other forum user wishes to replace the rear brake hose or cables on their Rise, here is my process. I am not a professional mechanic. I am 100% sure there are multiple ways to replace a rear brake hose or cable housing on a Rise. This is my process and it works for me. I'm happy to learn from others if you have a better suggestion. If you wish to do the work yourself, awesome! that's how you learn, it's not rocket science. If you have additional questions, send me a message and I'll be happy to help you out.

1)
I like to drop the motor only a few inches when I replace my brake hose or dropper/shift cable housing. I do not disconnect any wires and lower the motor onto a padded stool which I place several inches beneath the motor. There is enough slack in the wiring to do this. The motor's bottom is slightly uneven. I use a towel placed on the stool as padding to help stabilize the motor and prevent it from rolling off of the stool while I work. The whole process of removing the motor takes me a little less than ten minutes to do.

NOTE: To lower the motor, you must gain access and remove all six of the hex head bolts. Unfortunately, the chainring prevents one of the hex head bolts from being fully removed and it'll hang the motor up. The chainring must be removed in order to completely remove the bolt. It may be possible to remove the bolt without removing the chainring, but my guess is you'll end up damaging the chainring or the finish on the bolt.

I start by raising my bike up on a bicycle stand. I wrap a velcro strap around the rear brake lever and lock the rear brake. The locked rear brake keeps the front chainring from turning when you go to loosen the chainring nut. If you cannot lock your rear brake, i.e. the caliper has been removed, you can use a chain whip tool to hold the chainring while you loosen the nut. I use Park Tool's "LRT-2 Shimano Steps Lockring Socket Tool" to loosen the chainring spindle nut.

2) Remove the drive side crank arm and chainguide. Place your lockring socket tool on the chainring spindle nut and turn it "Clockwise" to loosen and remove the spindle nut. Note that the shaft is reverse thread and to loosen the nut you must turn the nut clockwise.

3) Pull the derailleur swing arm forward to un-tension the chain. Remove the chain from the chainring. With the chainring nut removed, pull the chainring off the drive spindle with a slight pull. Once the chainring is removed, you now will have access to all six motor mount hex bolts.

4) Jiggle the motor loose and "Slowly" lower the motor down a few inches and onto the stool. Make sure the motor doesn't fall off the stool. Now's a good time to grab a beer (Non IPA) or cup of coffee. There are three aluminum spacers used with the six bolts to mount the motor to the frame. One or more of the spacers may fall out when you remove the motor from the frame. Two of the spacers will have a small machined shoulder. These two spacers mount inside the frame at the front of the motor. The third spacer is flat on both sides and mounts at the back of the motor, non-drive side.

With the motor lowered, you now have access to all brake hose, cable housing and electrical connections. Inspect the shifter and dropper cable housing for wear. If they look bad, now's the time to replace them. Also check your wiring to make sure none of the insulation has been rubbed off from vibration.

5) Remove the black rubber rear brake hose/speed sensor retaining clamp on the inside of the non-drive side swing arm. Remove the brake hose from the rear caliper. Cut the olive off the end of the hose and remove the fitting. Attach the new brake hose to the end of the old hose using either electrical tape or a cable routing tool such as Park Tools "IR-1.2."

The black rubber hose guide tube between the frame and swingarm has a tight tolerance. I like to give my new brake hose a light coating of silicone lubrication to make it extra slippery so it will slide easily through the black rubber hose guide. Gently pull the old hose/new hose through the black rubber speed sensor clamp, the swing arm, through the black rubber hose guide and out the bottom of the frame. You will now have a loop of new brake hose and old brake hose coming out the bottom of the bike.

Now is a good time to grab a beer...Non-IPA....You're working up a sweat, stay hydrated. We don't want you passing out.

6) Gently start pulling the old brake hose out of the head tube while guiding the new brake hose up through the downtube. There is a small loop molded into the inside wall of the headtube. This loop keeps the brake hose from rubbing on the steerer tube. You may have a hang up at the headtube because of the loop. If so, you may have to drop your fork so you can get access to the loop and physically guide the brake hose through the headtube and out the headtube port.

7) Once the new brake hose/cable housing has been pulled out of the headtube, push and pull you new brake hose into position. Be sure you have given yourself enough slack at rear brake caliper to attach the banjo fitting, "O" rings and bolt. Make sure you have enough slack at the brake lever so that you can fully turn your front wheel without pinching the brake line. Do not install the brake hose to the lever. This will be done as a last step.

8) Examine the wiring in the area of the motor. Feel around with your fingers and make sure you have not inadvertently pinched a wire between the frame and housing. Make sure the cables, hose and wiring are sorted and not smashing each other.

9) Attach the banjo fitting to the rear caliper. You may see that the brake hose may be bulging out close to the rear wheel spokes. If this is the case, remove the banjo fitting and give it a 180 degree turn so that the brake hose dips in close to the swing arm and not towards the spokes. Re-attach the banjo fitting. The black rubber speed sensor/brake hose clamp on the inside arm of the swingarm uses a small zip tie to help secure the brake hose to the clamp. Install a new zip tire and tighten the black rubber clamp.

10) The angle where the downtube meets at the frame motor mount is sharp. You want your brake hose where it exits the downtube and makes the bend up into the black rubber hose guide to be snug, but not so snug the brake hose is pulled tight against the upper part of the downtube opening and frame. I like to give the brake hose a finger's width of slack between the downtube opening and top of the frame. The goal is to make sure you don't pinch the brake hose or cable housing where it bends sharply out of the downtube, while also insuring there isn't so much slack that the motor will pinch the hose or housing when you re-install the motor.

11) Prior to mounting the motor, have your Nm torque wrench, blue thread locker and non-IPA beer handy. Make sure the threads on the motor mounting bolts are clear of bulked up thread locker. If they are, clean them up with an old tooth brush. Make sure the six threaded bolt holes on the motor are also clear of debris.

With your fingers, reach up into the frame and make sure the front two motor spacers are pushed into their respective sockets at the front frame motor mounts. Lift the motor up into place. You will have to wiggle the motor a little bit to line up the first few bolts. The rear non-drive side aluminum spacer can be fussy to get into place. I've found it much easier to hold it against the motor and slide both the motor and spacer into position at the same time. Apply a small dab of blue thread locker onto each of the six bolts and install. Do not tighten the bolts until all of the bolts have been threaded into place. Torque the bolts to specification as listed in the "Blue Book" Rise owner's manual.

12) With a rag, clean the splined motor spindle. Clean the spines on the chainring. Place a light coating of lubricant on the spindle splines and chainring splines. Slide the chainring all the way onto the drive spindle. Install the chainring lockring nut and finger tighten counter-clockwise. With your lockring tool, turn the nut counter-clockwise to tighten the lockring to torque specifications.

13) Re-install your crankarm and chainguide arm. I use blue thread locker on the two clamp bolts and tighten to torque specifications. I also use a very small amount of blue thread locker on the threaded crank arm fixing cap.

14) Install the chain and lower the chainguide top piece into position and tighten.

15) Attach the brake hose to the lever using a new olive and barb. Make sure you have enough slack to fully turn the front wheel to either side. There are multiple YouTube videos that detail how to attach and bleed Shimano brake hose.

16) Go out and ride.

As a side note, I just got back from several days of riding in Las Vegas. I did rides out of Bootleg Canyon, Red Rock Canyon and Spring Mountain. Las Vegas has awesome trails. My Rise performed beautifully. If you would like to see pictures from my rides there, here are my Strava links.

Fook Yu - Spring Mountain Trails

Ike's Peek - Blue Diamond Trails

Boy Scout - Bootleg Canyon

Flowjob - Red Rock Canyon
 

Jmc123

Member
Nov 4, 2020
31
11
Hemel Hempstead
o my M20 came with 2 piston calipers and I want to go to 4 piston calipers. I want to run the XT but that means replacing the housing. Does anyone know if there are guide tubes in the frame or is the shop going to go crazy?
You can use the same hose but replace the caliper and lever. If you want to swap to say something like maguras you have to replace the hose. This isn't that difficult but you have to remove the battery and rear wheel for better access.
 

Calsun

New Member
May 17, 2021
49
22
Monterey CA
o my M20 came with 2 piston calipers and I want to go to 4 piston calipers. I want to run the XT but that means replacing the housing. Does anyone know if there are guide tubes in the frame or is the shop going to go crazy?

The tests I have read showed that the largest increase in braking power came from large rotors and not going to 4 piston calipers. Going to a 180mm or 200mm rotors should be the first step.
 

DanMcDan

Active member
Mar 18, 2021
158
111
Torquay
To save all this hassle, you can just switch the two pot callipers to the m520 4 pot callipers, then you don’t have to switch any hoses or levers.
 

Rod B.

Well-known member
Aug 18, 2021
493
838
USA, Orange County Ca.
The Limited, Team and M10 comes with Shimano XT or XTR four piston brakes which use Shimano BH-90-SB, Straight to Banjo fitting brake hose. The Rise M20 comes with Deore M6100 two piston calipers which uses Shimano BH-90-SS, Straight to Straight, fitting brake hose.

The newer style four piston SLX-M7120, XT-M8120 and XTR-M9120 calipers are not compatible with the Rise M20, BH-90-SS straight fitting brake hose. If a person wants to go with a newer style four piston caliper, but does not want to swap out the straight fitting brake hose, they can use a banjo style adapter which attaches to the straight fitting. The other option is to completely replace the brake hose.

As mentioned by Dan McDan, Shimano does make older style four piston calipers i.e. M6120, M520 which work well and use straight fitting brake hose.

One of the weak spots on the Rise M20 is the Shimano SM-RT-64 180mm centerlock rotor which comes on the front and rear. It's a good rotor, but the rotor face design doesn't shed heat very well and I experienced a lot of brake fade on long downhill runs. I went with a Shimano 203mm SM-RT-MT800 ice tech rotor on the front and a 180mm RT-EM800 on the rear which works really well, especially with a four piston caliper.

If you are interested, I like the "LoveMTB" YouTube channel. The guy does great evaluations on mountain bike components. You may find this comparison episode interesting in which he compares the newer style Shimano four piston XT calipers and levers against the Deore four piston calipers and brake lever.


vladej

Member
Jun 28, 2021
26
9
Slovenia
Hi,

On my Rise M20 I have 4 piston brakes Shimano M6120 and I also swapped front rotor to 203mm Shimano RT-MT800. I left rear rotor 180mm as is.

I’m very happy with brake performance of M6120 and front brake is very efficient on long descents too. On the other hand, I’m not a heavy rider, less then 75kg with all gear, so maybe other guys should replace rear root for 203mm too.
 

faberle

Active member
Subscriber
Jun 29, 2021
78
73
France Haute Savoie
The Shimano XT 4 piston on my M10 are doing great job at stopping the bike, especially after upgrading to 203 rotors. They are reliable so far, silent and easy to bleed. The one finger levers are super comfortable. In short, they would be perfect if there were more progressive. I feel they are really on the "on/off" side, which isn't super securing on very slippery tracks that we have in this season. I have SRAM Code RSC on my other bike which I feel are more progressive, without compromising on the rest (power, reliability, ease of maintenance) I will try them on my Rise. Thanks @Rod B. but the super clear and detailed instructions on the hose replacement.
 

2WheelsNot4

E*POWAH Master
Oct 17, 2021
891
689
Scotland
Anyone got a ball park figure of what an LBS might charge to swap out the brakes for a different set. ? Just roughly.
See I dont fance doing it myself, as with age comes great laziness.
 

hugoagogo

Member
Sep 14, 2021
8
5
UK
I put hope brakes on my rise for a bit, used a screw to join the existing shimano brake hose to the hope one and pulled it through the frame and swinger no probs. Didn't have to touch the motor.

Went back to shimano's a couple of weeks later using the same method, no probs again.
 

Underblu

Member
Aug 22, 2021
41
41
USA
I bought Code RSCs In advance of receiving my Rise M20 but have not installed them yet. I actually like the stock Shimano 6100 brakes. Afaic they have very good modulation. While the lever travel before the initial bite is less than the Code R brakes that I have on my Heckler MX-S, the actual modulation between initial bite and full lock is very progressive.

I may leave these Shimano brakes on the Rise and install the RSCs on my Heckler.

Loving the Rise btw. I have a Race Face NEXT 35 Carbon bar and a Shimano SC-em800 that I will have installed as soon as I can stop riding it for a few days
 

Marky Mark

Member
Jan 27, 2019
8
3
Leuven
My M20 front brake 203 mm galfer disc rear brake 180 mm galfer disc + 4 piston br mt 520 front& rear works very good.

I had on my previous e mtb 25 kg the same 4 piston br mt 520 brakes. And that worked also very good
 

Shjay

Well-known member
Apr 30, 2019
835
488
Kent
My M20 I dropped just the motor to replace rear brake hose, I didn’t remove battery, I cut hose at lever end, attached gear outer cables with red reverb barb connecter fed cable all the way through frame & rear triangle then attached my Magura cable & threaded all the way from rear triangle back up & out of top of frame using gear cable to pull brake cables through. Then sold SLX brakes as complete set with extra barb & olive
 

Rod B.

Well-known member
Aug 18, 2021
493
838
USA, Orange County Ca.
Hugoagogo,
It's always great when I hear of a new way of doing things. I'd never thought to take a machine screw, cut the head cut off, and thread the screw portion into one end of the old hose and thread the other end of the screw into the new hose. It would make a strong and seamless connection between the two hoses and also make it very easy to pull the brake hose or a dropper/shift cable housing through the frame. Awesome idea, I love it.

For those interested, my buddy just got a M20. He asked me to install Deore M6120 four piston calipers, front and back on the bike. We also installed a Shimano 203mm Ice Tech rotor on the front. He also has a Pivot Trail 429 with Shimano XT M8120 brakes. After riding the Rise, He told me the Deore M6120 four piston brakes worked equally as good as the XT brakes on his Pivot.
 

Funks

Member
Oct 8, 2021
82
48
Dublin, CA
To save all this hassle, you can just switch the two pot callipers to the m520 4 pot callipers, then you don’t have to switch any hoses or levers.

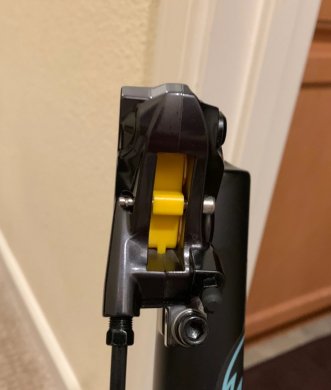
The BR-MT520 and the BR-M6120 are the exact same caliper aside from the branding. I say get whatever is cheapest! (it's usually the BR-MT520). They have ceramic pistons just like M7120 and M8120.

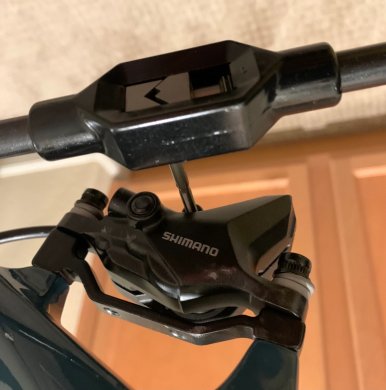
The sintered pads that comes with the MT520's or the MT6120s will most likely howl like mad (D02S) and will drive you insane if you like quiet. And if you get the RESIN pads with it (D03S) - it won't be up to snuff. I say get some good pads as well, MTX GOLDS for the front, and REDS on the rear. The only thing nice about the BR-M7120's and the BR-M8120's is that it uses a bolt and a clip to retain the pad instead of a cotter pin. But it's easy to convert the MT520's and the MT6120's to use the bolt and clip (Y8JZ98010) as well with a (4mm by .7) tap

img_8319-jpg.1932444.jpg

img_8322-jpg.1932445.jpg

Not sure why people spend so much money on the SLX and the XT brake sets, when the BL-M6100 / BR-M6120 (or BR-MT520) + MTX pads will most likely perform better (primarily due to the pads).

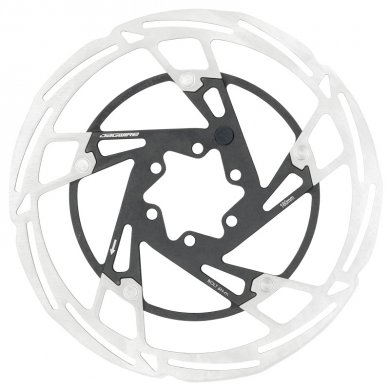
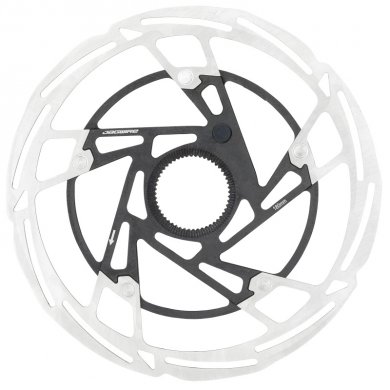
As for Rotors - JAGWIRE also sells 203mm rotors with magnets in it (Jagwire Pro LR2-E), available in Center Lock or 6-bolt as well. Pretty hard to get Shimano parts.

DCR080.jpg

DCR090.jpg
 
Last edited:
Dec 1, 2021
23
7
Netherlands
I put hope brakes on my rise for a bit, used a screw to join the existing shimano brake hose to the hope one and pulled it through the frame and swinger no probs. Didn't have to touch the motor.

Went back to shimano's a couple of weeks later using the same method, no probs again.
Why did you went back? i was also thinking to put hopes on.
 

hugoagogo

Member
Sep 14, 2021
8
5
UK
Why did you went back? i was also thinking to put hopes on.
The hopes felt underpowered, wasn't a problem on the analogue bike but didn't feel as good at slowing down the extra weight of the ebike. Had a hairy, slightly out of control descent and swapped them back out immediately. Might have got round it with bleeding, different fluid, different pads, bigger discs but I wanted some instant grabbyness so put the shimanos back on and a 223 disc up front, probably need to get a 200 for the rear.

Rode a friends Levo SL with Magura MT7s - very very grabby coming from hopes, more powerful than Shimano's if that's what you're looking for.

I used to love the feel of Hopes but got used to the XTs pretty quickly.
 

jbrown15

Well-known member
May 27, 2020
742
628
Chilliwack, Canada
The hopes felt underpowered, wasn't a problem on the analogue bike but didn't feel as good at slowing down the extra weight of the ebike. Had a hairy, slightly out of control descent and swapped them back out immediately. Might have got round it with bleeding, different fluid, different pads, bigger discs but I wanted some instant grabbyness so put the shimanos back on and a 223 disc up front, probably need to get a 200 for the rear.

Rode a friends Levo SL with Magura MT7s - very very grabby coming from hopes, more powerful than Shimano's if that's what you're looking for.

I used to love the feel of Hopes but got used to the XTs pretty quickly.

You should try Magura MT5 or MT7 calipers with Shimano levers, all the stopping power of the Magura's but without the crappy lever feel.
I'm currently running MT5 calipers with my XTR M9120 levers and they are the best brakes I've used to date.
 

EMTB Forums

Since 2018

The World's largest electric mountain bike community.

523K
Messages
25,818
Members
Join Our Community

Latest articles


Top